Customize your 3D file
settings.json controls how your 3D scene looks and where the camera starts. You create it in SuperSplat, a free tool for working with Gaussian Splats, and then add it to your 3D ZIP.
You don't need to write it by hand
Set everything up visually in SuperSplat and save the result. The example below only shows what the file looks like.
Generate your settings.json
You will upload your splat to SuperSplat, adjust it in Studio, download the settings file, rename it, and add it to your ZIP.
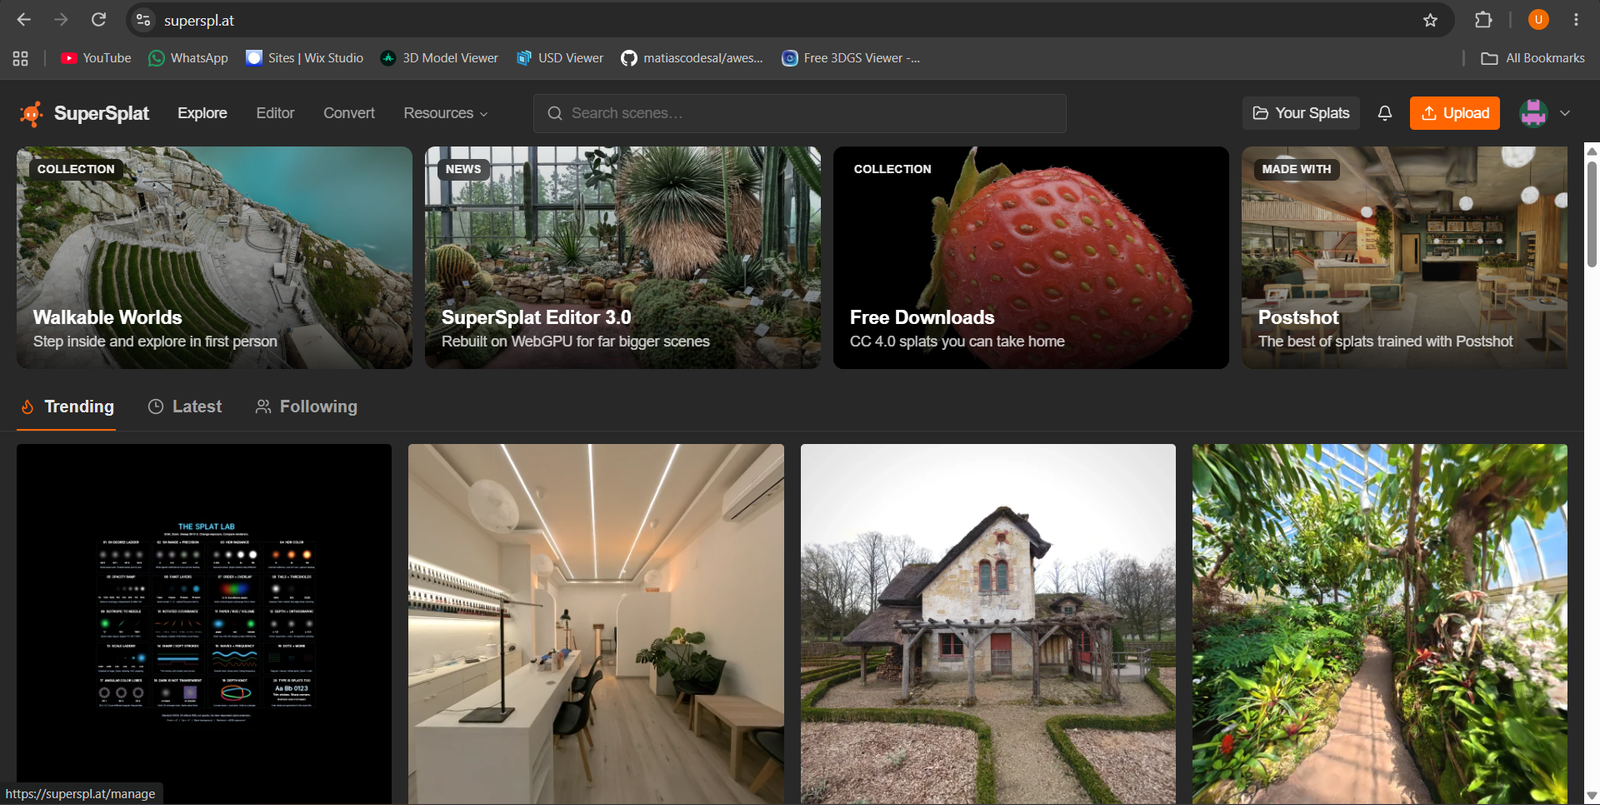
1. Go to SuperSplat and sign in
Visit superspl.at. Click your profile area in the top right to log in, or sign up if you don't have an account yet. It is free.
2. Upload your raw splat file
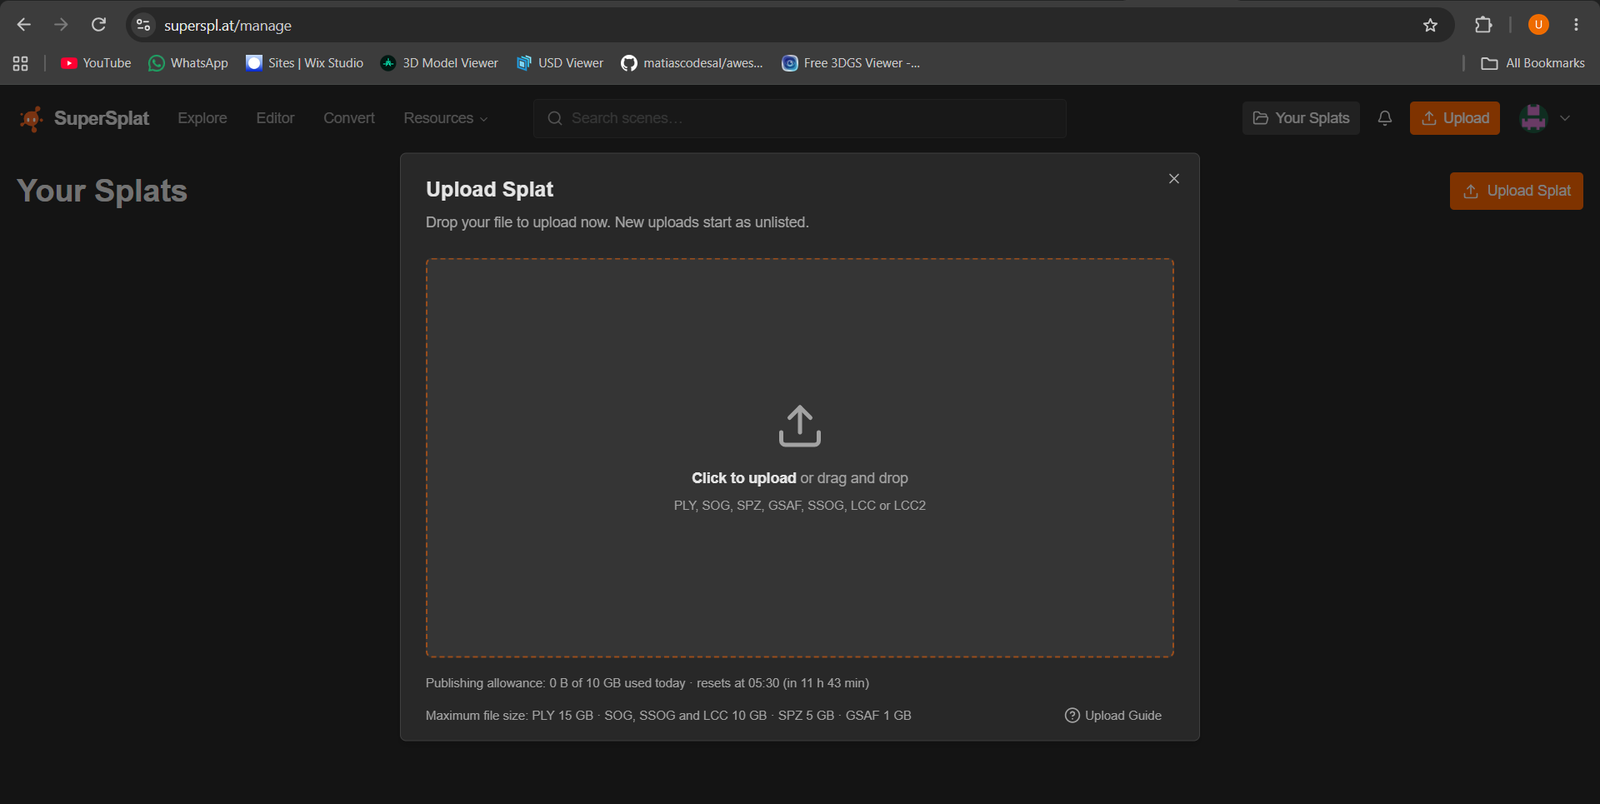
Click Upload in the top bar (or Upload Splat on the Your Splats page). Click the upload area, or drag and drop your file. SuperSplat accepts .ply, .sog and other splat formats.
Note
New uploads start as Unlisted, so only people with the link can see them.
3. Open it in Studio
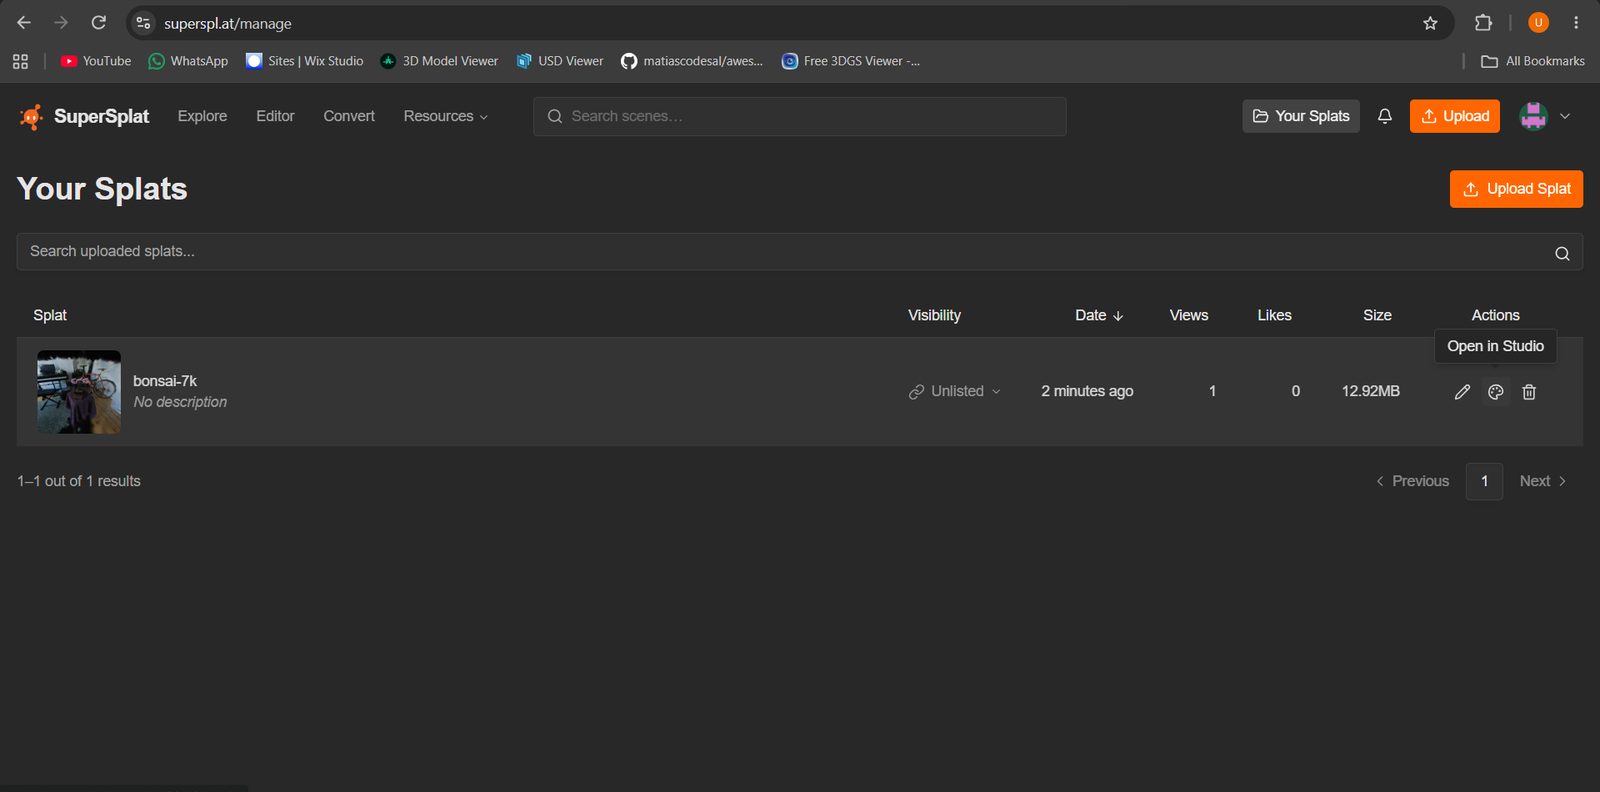
When the upload finishes, your splat appears on the Your Splats dashboard (superspl.at/manage). In the Actions column, click the Open in Studio icon (the palette icon, between the pencil and the bin).
Note
Only the person who uploaded the splat can open it in Studio. A desktop browser works best.
4. Customize your splat
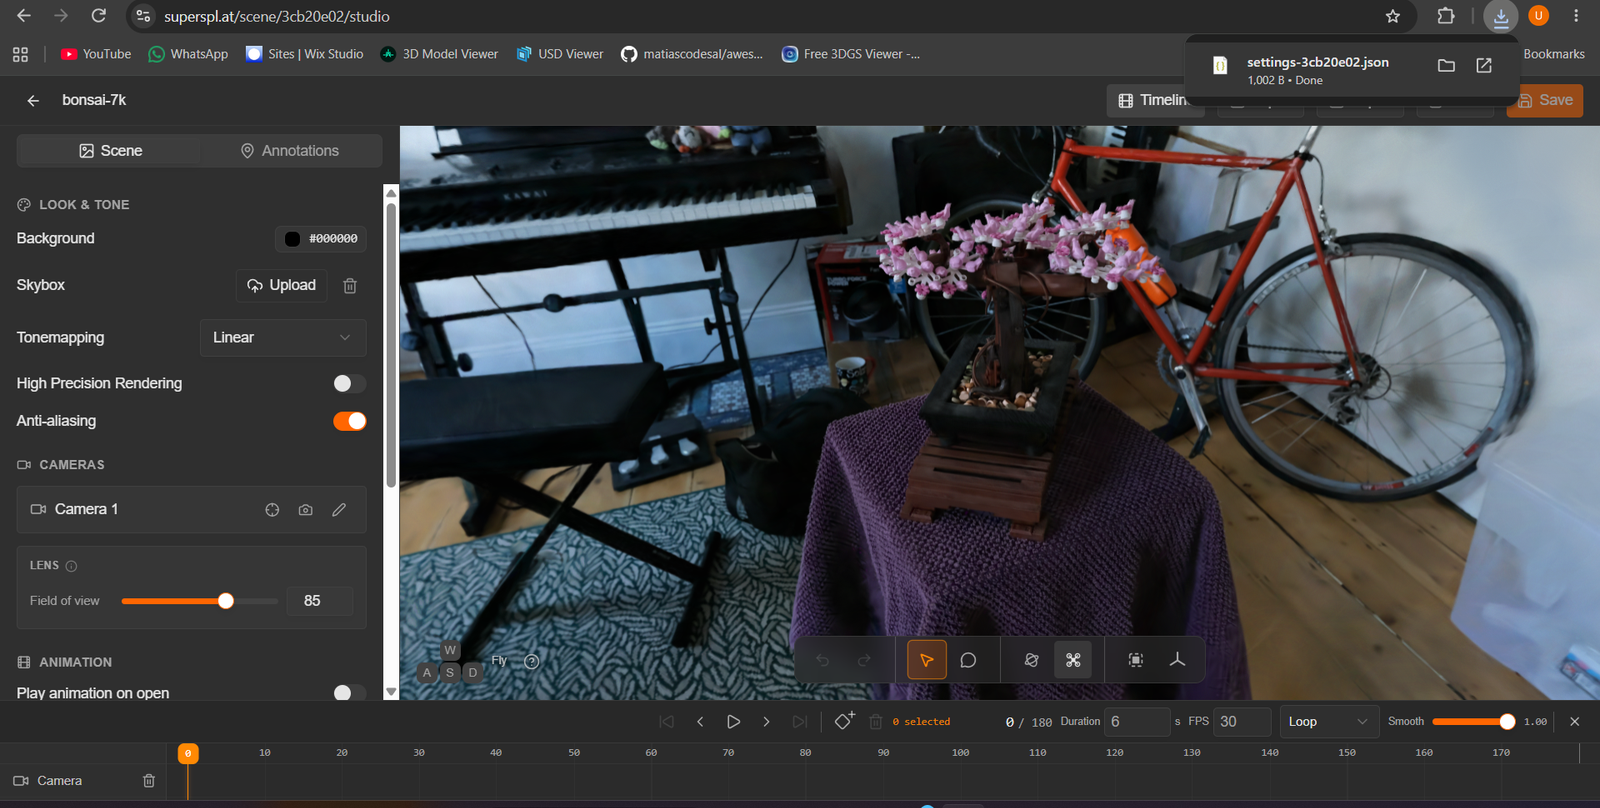
Use the left panel of Studio to set up how the scene should look.
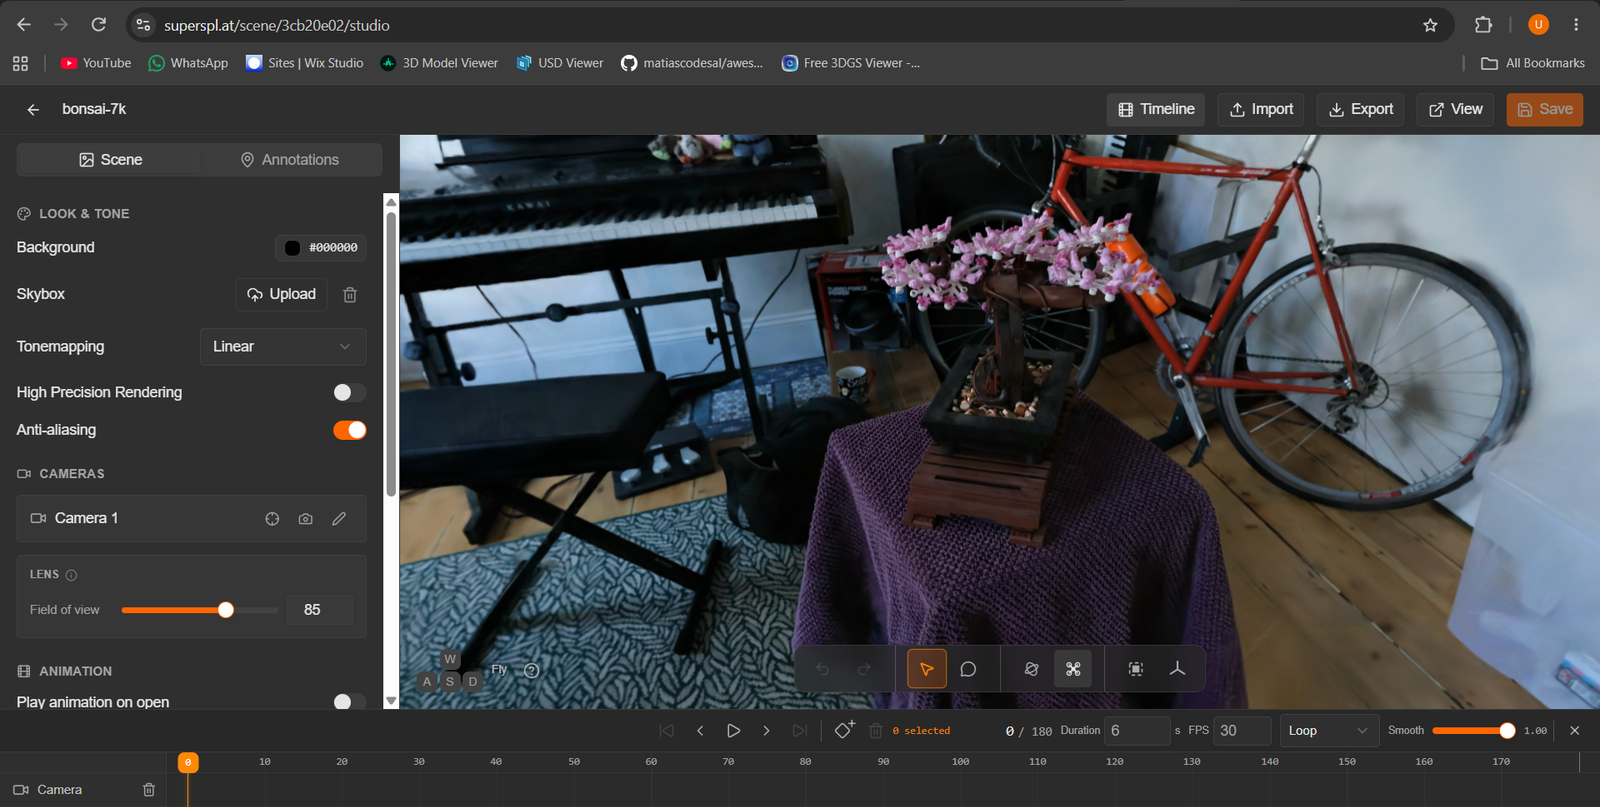
| Section | What you can set |
|---|---|
| Look & Tone | Background color, skybox, tone mapping and high-precision rendering. |
| Cameras | The camera that visitors see first, and its field of view. |
| Animation | Whether the camera animation plays when the scene opens. |
| Annotations tab | Text hotspots placed in the scene. |
Move to the angle you want visitors to see first and set it on Camera 1.
Tip
Camera animations are created in the Timeline at the bottom of Studio.
5. Export the settings file
Click Save in the header so your changes are kept, then click Export and download the settings file. Your browser saves it with a name such as settings-3cb20e02.json.
6. Rename it to settings.json
Rename the downloaded file to exactly settings.json. For example, settings-3cb20e02.json becomes settings.json.
- Open your Downloads folder.
- Right-click
settings-3cb20e02.jsonand choose Rename, or select it and press F2. - Type
settings.jsonand press Enter.
- Open your Downloads folder in Finder.
- Click
settings-3cb20e02.jsononce, then press Enter. - Type
settings.jsonand press Enter. If asked, click Use .json.
The name must be exact
The viewer only looks for a file called settings.json. A name like settings-3cb20e02.json or settings (1).json is ignored.
Check you didn't end up with settings.json.json
If your computer hides file extensions, you may type settings.json and get settings.json.json. On Windows, turn on View → Show → File name extensions in File Explorer to see the full name.
7. Put it in your ZIP and upload
Add settings.json to the same .zip as your splat file (for example bonsai-7k.sog or your .ply), then upload the ZIP in the dashboard. The viewer reads the settings from the ZIP that is playing, so your customization now shows on the product page.
One ZIP, one settings file
A variant with its own ZIP uses that ZIP's settings.json, not the product's.
Example
{
  "version": 2,
  "tonemapping": "linear",
  "highPrecisionRendering": false,
  "background": { "color": [0.051, 0.067, 0.09] },
  "postEffectSettings": {
    "sharpness": { "enabled": false, "amount": 0 },
    "bloom": { "enabled": false, "intensity": 0.1, "blurLevel": 2 },
    "grading": { "enabled": false, "brightness": 1, "contrast": 1, "saturation": 1, "tint": [1, 1, 1] },
    "vignette": { "enabled": false, "intensity": 0.5, "inner": 0.3, "outer": 0.75, "curvature": 1 },
    "fringing": { "enabled": false, "intensity": 0.5 }
  },
  "animTracks": [],
  "cameras": [
    { "initial": { "position": [4, 4, -4], "target": [0, 0, 0], "fov": 60 } }
  ],
  "annotations": [],
  "startMode": "default"
}
How your file is checked
When you upload a ZIP, the dashboard checks settings.json and refuses the upload if it finds a problem. The message names the field, for example settings.json tonemapping must be one of: none, linear, filmic, hejl, aces, aces2, neutral. Fix the file and upload again. See Troubleshooting.
Common mistakes
- A trailing comma makes the whole file invalid JSON.
- Option names are case-sensitive.
- The file must be named exactly
settings.jsonand be inside the ZIP. - Colors use
0to1, not0to255.